How to set up DVSwitch on Android
You must be either a “Supporting Member” or “Lifetime Member” to have RoIP (Radio over IP) access to the repeater system. PLEASE NOTE: Your username and password information will be emailed to you in a separate email. Setup and activation of IAX remote access is not automated, so please be patient as it may take a few days to get you setup on the server.
Setting up your Android device with DVSwitch
You can use the following procedures to:
- Download and install DVSwitch on your Android device,
- Set up the program options, and
- Talk through the repeater from your Android device.
Installation
- Download and install the DVSwitch Mobile application from the Google Play Store.
- DVSwitch Mobile – Apps on Google Play
- The app will downloads and installs on your device.
Account Setup
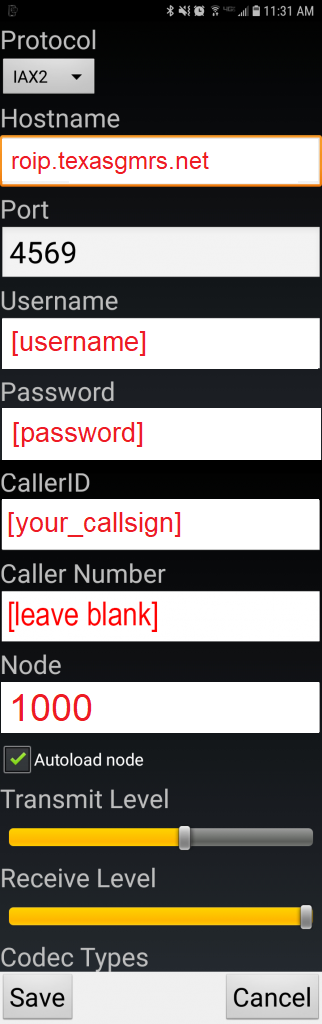
From the main menu, select Accounts and then select the first profile and configure the
account.
- When you luanch the app for the first time you will be asked asked if you want to record audio. Select ALLOW.
- The main screen is called the “Dialer” page.
- Select the “Accounts” tab tab a the top.
- The Accounts window appears. At this time, all entries are empty.
- Click on the text of the first line (not the check box). The Accounts Entry page appears.
- Fill in the fields with the information from your email. See example below
- Select Save. The Accounts window appears, showing your entry on the first line.
- Select the back arrow on the lower left of the Android screen. (Early versions of Android may have the back arrow on the lower right of the device.) The Dialer tab will appears.
Connecting
- You can select the node, use PTT, and set up the sound levels as follows:
- Make sure your Wi-Fi is on and connected. If the program is not running, select the Android IAXRPT
app from the list of apps on your Android device.
The main window or Dialer tab opens with the last selected node number on the top line. - To select a node, select the Accounts tab, and then select the check box on the line for the desired node.
- Select the back arrow on the lower left of the Android screen.
The Dialer tab appears, showing your selected node. - Click on Send to connect to the Texas GMRS Network. When the host connects you will hear it say “Welcome, Node Connected.”
Transmitting
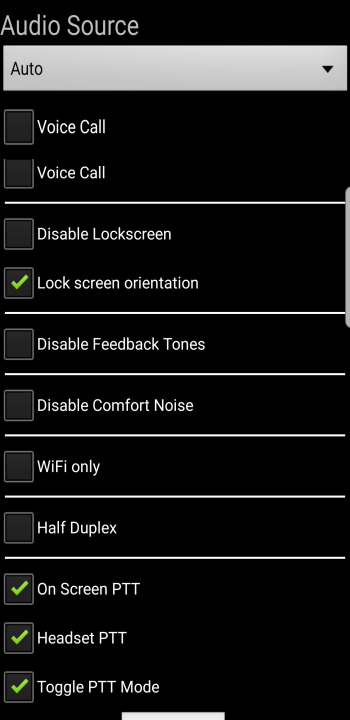
- To talk, when connected, select and release PTT (the button will go red), speak through the Android microphone, and then select and release (the button will return to white). Other PTT options (e.g., Headset PTT, Volume PTT) can be seleted from the Config tab.
- See example below.

Audio Adjustment
- To set up the microphone levels, select the Accounts tab, and then the Accounts Entry page for the
node. The Transmit Level (default 100) for that node is at the bottom of the page. Overtype as
necessary. Select Save to save the settings. - Use the Audio Source to select Auto, Audio, Bluetooth and Speaker.
- See example below.
Disconnecting
- Select Hangup to disconnect from the host computer.